Building Sound-Reactive Lights for the TV or Monitor
Add attractive backlight color effects for any TV or monitor using this simple electronic project. The Sound-Reactive DIY RGB Led kit that we are planning to make is reacting to the music or any sound from your TV. And also the home theatre or any other suitable device. Apart from that as it is reactive to the sound, it has the possibility to select from 118 various lighting effects. Also, there are custom effects to create.
After making it can be used as a surrounding light and placed behind the TV screen or on the gaming PC while your mother board is not supporting RGB or ARGB.
Things that are required for this project
- A WS2812 transportable RGB LED strip. Find a 5-meter non-waterproof strip.
- An ESP8266-based MCU like NodeMCU or D1 Mini. If you are already having you can use ESP32.
- A microphone program. You can select any or whatever available based on your location.
- INMP401 MEMS mike
- MAX4466 amplifier mike
- MAX9814 amplifier mike
- A 5V 3A or any other powerful supplier
Skills Required for the project
A very strong skill is required. Anyhow if you do have not any previous experience or need any support to get started, check our earlier guide on learning how to solder.
Step 1: Download and Flash the Firmware
- We are using the WLED sound reactive project on this work.
- You have to download the WLED Sound reactive to the new solid release for ESP8266 or ESP32 board. It depends on whatever board you are using.
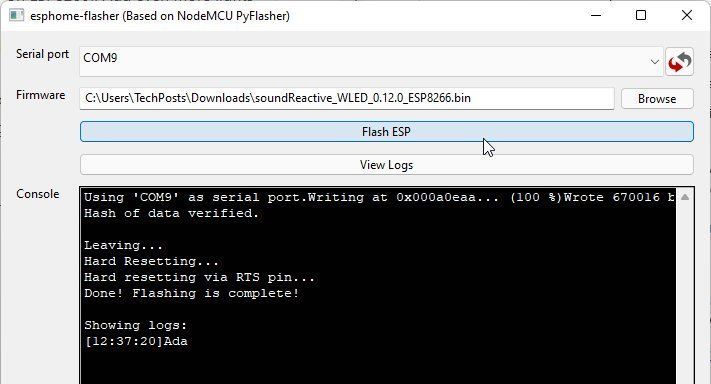
- Go to the COM Port where ESP8266 or ESP32 is linked.
- Click Browse to select the WLED firmware.
- Then click Flash ESP and wait until the flash process completes it.
Step 2: Connecting WS2812 to ESP8266/ESP32 Board
After the firmware is flashed, connect the WS2812B ARGB LED kit to the ESP32 or ESP8266 board. Connect the ARGB power supply directly to the ESP boards VIN and GND pins. Or else use any other power supply to function the LED kit with a common ground.
See the below-given diagram and pair the RGB kit and the nic for the ESP module.

If you have no power supply or don’t need to invest in one, link the LED strip straightly with the NodeMCU or ESP32 and give the power by a micro USB cable. Though the method works, it can damage the MCU and it cannot be recommended.
Step 3: Set Up Sound-Reactive Backlight
After connecting the mic and the WS2812B LED strip to the ESP board. Link the 5V power supply to switch on the device.
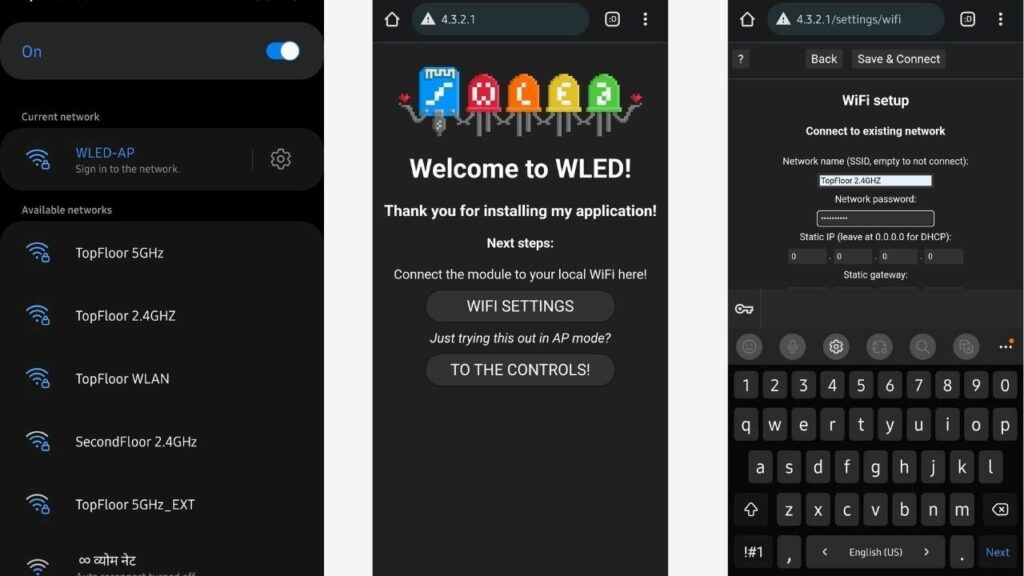
- Go to the Wi-Fi settings on your smartphone or on your PC and link the WLED –AP network.
- After connecting, switch off mobile data and open the web browser app. Like Chrome or Safari existing on your phone.
- Go to the IP address 4.3.2.1 and click Wi-Fi Settings.
- Enter the Wi-Fi SSID and password.
- Then save & Connect. The ESP will remove the AP mode and will connect to the Wi-Fi network.
- Go to the play store and Install the app WLED
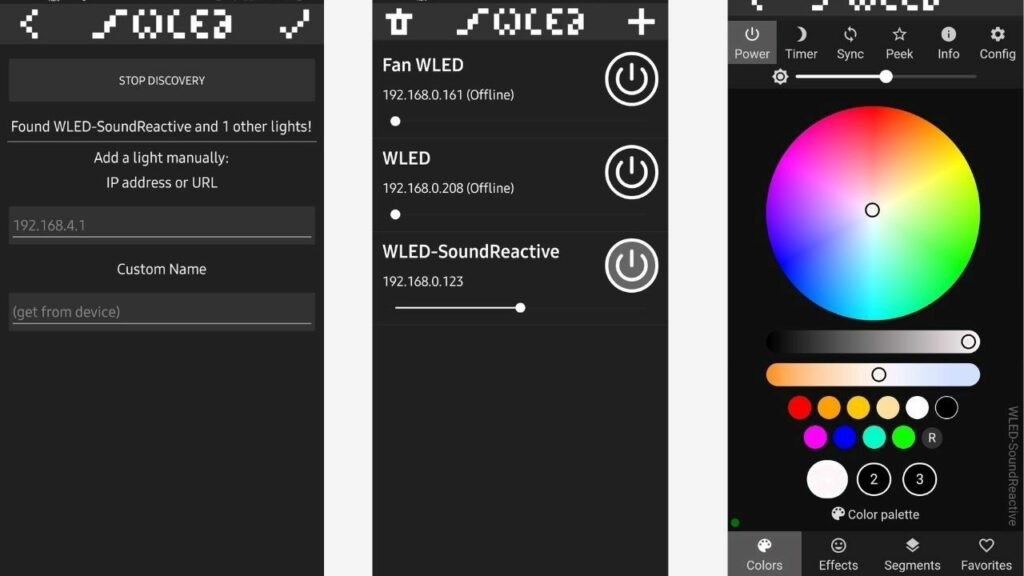
- Open the WLED app and click + icon.
- Select Discover Lights. The module will find the RGB strip itself that is connected to the Wi-Fi network.
- Tap the icon tick/check at the top.
- Next tap on WLED-SoundReactive. After it will load the control screen you can change the color, pattern, and effects. Before all these, you have to configure it.
- Slect Config> LED Preferences.
- Calculate the number of LEDs after fixing them at the back side of your TV or monitor. input it in the Titel LED sound section.
- Under the Hardware set up on the page type ‘2’ in Pin ’0 ’ in the begging. And the last LED set in the Count felid. Click on Save.
Step 4: Testing the Sound-Reactive LED Strip and Adjusting the Sensitivity
Now you can control it. The LED kit with the WLED app and modify the effects and brightness with extra things. The sound sensitivity can be changed through the WLED settings as you need. To do this function, go to Config> Sound Settings. There are two kinds of settings for you.
Two types of settings
Squelch The minimums gateway that the lights show any color or any effect. The higher value requires a higher sound pitch to set off the LED.
Gain: The sensitivity of the sound. The higher the sensitivity sounds good.
After the input of the values in the Squelch and Gain sections click on Save. You can work on the settings till you gain the best experience.
There are 135 sound reactive effects under the term effects. You have the possibility to change or select t nin sound reactive effect. The *Noisemeter is good in most cases. You can choose the palate to modify the colors or make anything using a collection of pallets with its effects. Further, change the speed, intensity and the brightness of the LED to moderate the effects,
Step 5: Link With Home Assistant (Optional)
Setup the Home Assistant to modify the DIY Smart Sound-Reactive lights. Control the effects, brightness, and the other settings using one pallet. Get the remote access by this to your smart lights. And also can enable the MQTT or reproduce the skit as Philips Hue and use the Alexa voice to control the strip. (Do it by using Cong>Sync Interface)
Setting Up Multiple WLEDs and Syncing Them
Already you have built a sound reactive backlight for your TV or the personal computer. If you need can set up many WS2812 ARGB LED strips in your room and connect them all using the built-in UDP protocol. Then you can see multiple access altogether with few taps. This DIY is for individually controlling or for group usage. It is available for Android apps on the Play store. We have mentioned it in the article above.
You can even use a voice assistant like Alexa to control the RGB strip, for changing the brightness or the color on your board. Ans also add this in Home assistant to control the RGB strips using only one Dashboard.
Editor’s choice;