
Being labeled a low-quality site by Google because your pages load slowly will cost you in the long run. Take some time out to improve the speed of your website and the user experience. (boost the website performance with W3 Total Cache and a CDN)
How long do you think it will take you to get tired of our conversation if I stop for three minutes before answering to any question you ask me? That is exactly how you should consider your website’s speed. This post will assist you in increasing the pace of your website and avoiding making your visitors wait.
There are numerous reasons why speed is so important. The first is, of course, user experience. You’ve undoubtedly done it yourself: typed in a Google query, visited a site that claimed to have the answer, and then sat there for several torturous minutes waiting for the badly optimized page to load.
However, it is more than just a matter of user experience. The time it takes for Google to load your page determines the quality of your site. Being labeled a low-quality site by Google because your pages load slowly will have a significant negative impact on your site in the long run: you will be ranked lower in search results, and less people will visit your site.
Taking the time to execute regular maintenance and optimization on your website will pay you in the long run. In this article, I’ll show you how to speed up your website by tweaking the settings of W3 Total Cache for WordPress. James covered the basics of W3 Total Cache setup a few years back, but in this article, I’ll go over everything in greater depth, including how to set up a Content Delivery Network to improve your site’s speed and user experience.
Optimizing W3 Total Cache for WordPress
It’s usually a good idea to take a backup of your site before tinkering with the settings in your WP Admin panel and your web hosting control panel. There are several options for doing so, including using plugins like UpdraftPlus, which Kev recently reviewed, or the WordPress Backup plugin, which I recently reviewed. If you don’t want to use plugins, you can use the SSH command line or a web server app like MySQLDumper to accomplish the task.
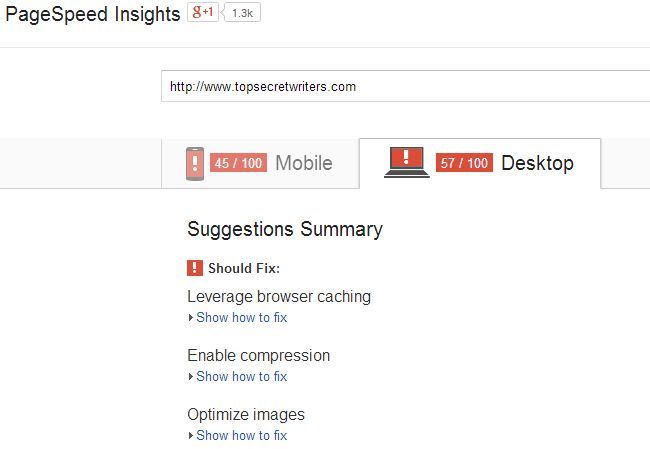
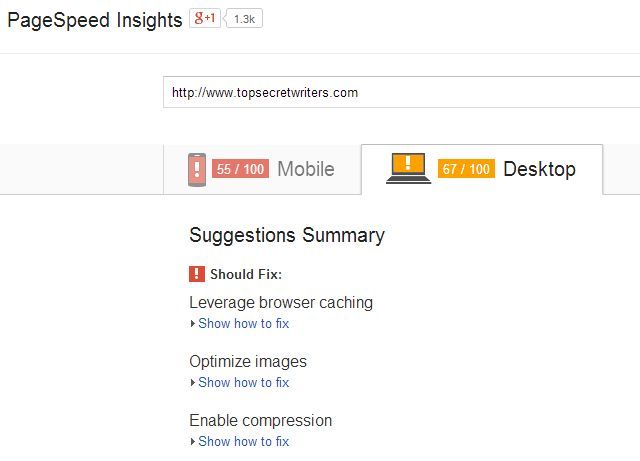
After that, you should run a brief benchmark speed test for your website. PageSpeed Insights, which most webmasters use to assess their site’s speed, that recently reviewed by Dave LeClair. In my situation, PageSpeed revealed that I still have a lot of work to do to improve the performance of my website.
It’s usually a good idea to run a few independent benchmarks, so I used Pingdom to perform a performance test on my blog. Again, the performance was dreadful.
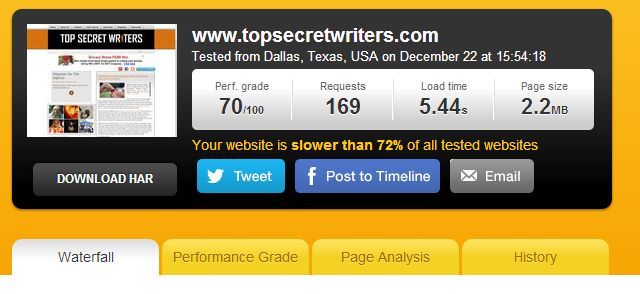
According to Pingdom, my site is slower than 72 percent of all other websites that have been tested. That’s a real bummer!
Years ago, I installed W3 Total Cache and configured it with the basic settings specified by James in his post (linked above), but I never took the time to learn the plugin and how to optimize it.
Ideal W3 Total Cache Settings
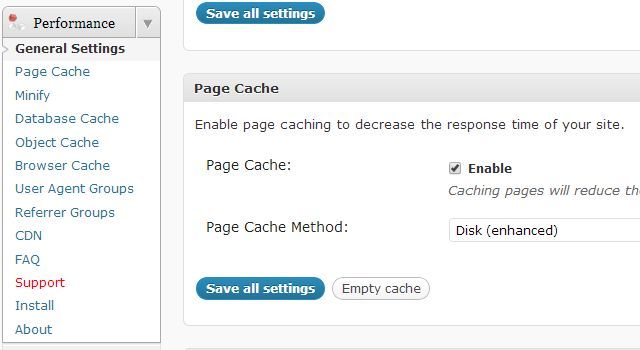
As James indicated, you should always enable Page Cache, the first setting on the W3 Total Cache settings page, and choose “Disk (improved)” from the Page Cache Method drop-down menu. This setting will produce static cached pages for every page on your site that is loaded by the reader. So the page will not dynamically load the next time they visit it.
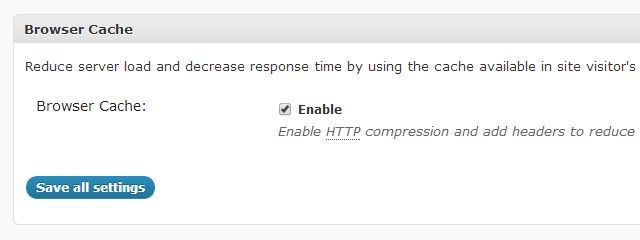
This one tweak alone can significantly enhance your site’s performance. The second option is the Browser Cache option, which may find deeper down the settings page. What is the purpose of this option? It basically tells the browser to save pictures, CSS, JavaScript, and any other static files on the page to a temporary folder. So that, subsequent pages can use the same static assets from the browser cache instead of having to re-download them from your website. To enable this, go to the Browser Cache section and select “Enable.”
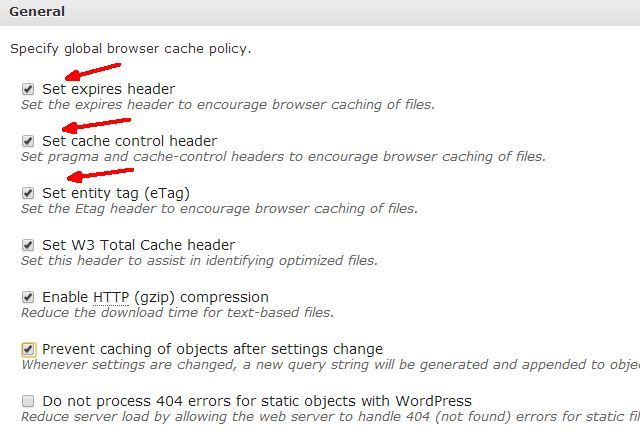
Then, on the Admin panel, click “Browser Cache” under the W3 Total Cache “Performance” section. Except for caching 404 errors, I usually enable everything. The most important thing is to make sure that the first three options set to default.
It’s time to run another benchmark now that W3 Total Cache installs to see how things have improved.
Benchmark After W3 Total Cache Set Up
Using PageSpeed Insights, I discovered that both Mobile and Desktop had improved by ten points. And Desktop had moved out of the read zone.
The most significant increase discovered by Pingdom. Performance went from being 72 percent slower than most other sites to being 52 percent quicker!

W3 Total Cache has made a significant difference. But, there are still some things you can do to improve the performance of your website.
Your Web Server Should Compress Content
Google engineers explain how crucial it is to compress online information in order to save Internet bandwidth in an essay on Google Developers. In fact, their essay begins with the dramatic declaration, “Every day, uncompressed content wastes more than 99 human years.”
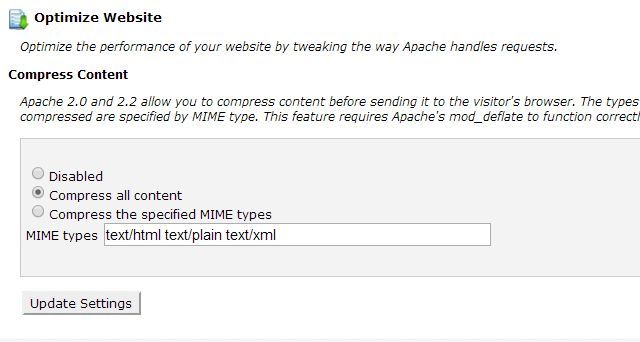
If you don’t want to waste your readers’ time, look through your web hosting account for any “Optimize Website” tools in the CPanel. You’ll notice that it’s set to “Disabled” by default. Change “Compress all material” to “Compress all content” and then click “Update Settings.”
This will put a little more strain on the web server’s CPU. But the savings in bandwidth will be well worth it. Just keep an eye on your server (or let your host know what you’re doing) to make sure the CPU load doesn’t skyrocket.
When I run another bookmark test, I see that this update has improved my performance by 5% more.

There’s still more you can do, of course. You can sign up for a Content Delivery Network (CDN) service, for example.
Why Using a CDN Boosts Performance
A Content Delivery Network (CDN) is a service that uses servers all over the world to deliver content. When you use a CDN, your static content, such as photos, CSS files, and JavaScript, cache on various web servers across the world. The CDN solution directs visitors to the web server closest to their geographic location when they visit your website.
This implies that if you have a web hosting account with headquarters and a data center in Houston, Texas, a reader in Australia won’t have to wait for a connection to load between their browser and the web server in Texas. Instead, a CDN server will provide the material in a fraction of the time.
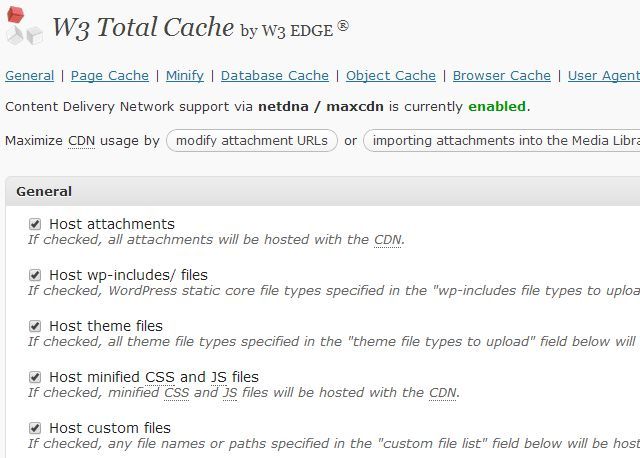
On the main settings page, under the Content Delivery Network section, W3 Total Cache allows you to set up a CDN.
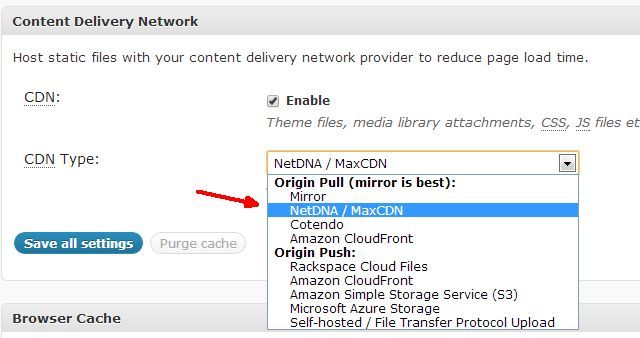
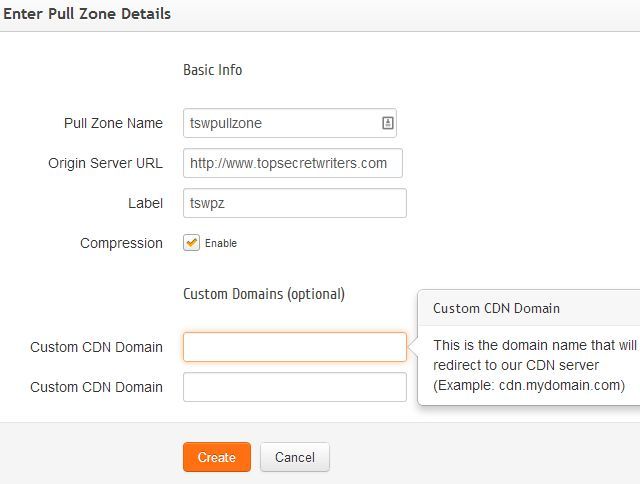
I’ve signed up for a MaxCDN account in my situation. These aren’t free accounts, but they’re reasonably priced. Monthly bandwidth for a website of roughly 500 GB costs around $40 per month, while upgrading to a 1 TB corporate account costs only around $80 per month. In your CDN account, you’ll need to create a “Pull Zone.”
Always enable Compression if the option is available to save bandwidth.
After you’ve set up your Pull Zone, the provider will provide you with the CDN URL. You’ll need to configure CDN in W3 Total Cache.
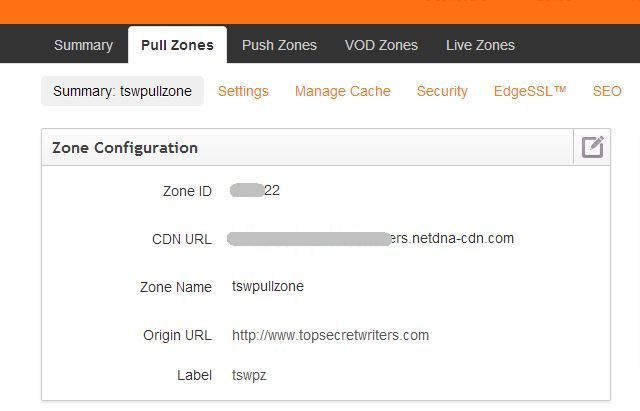
Return to WP-Admin on WordPress and navigate to the CDN Configuration menu using the CDN URL from your CDN account. Fill in the “Replace site’s hostname with:” area with the URL.
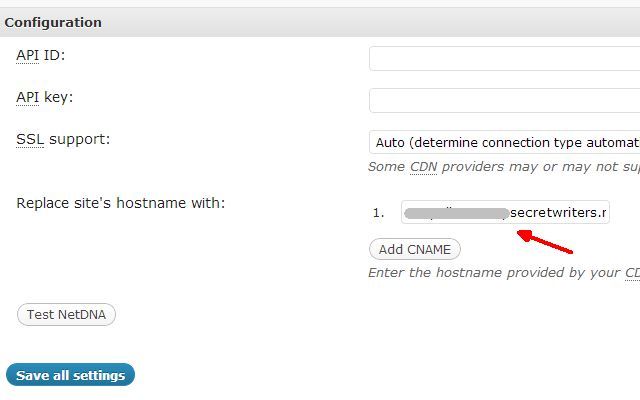
This section may seem different if you’re using the most recent version of W3 Total Cache. You’ll see a “Authorize” button that you may utilize to receive an API key right away. You can also queue several sub-domains from your site using a single CDN URL. But you’ll have to add the CNAME. Then put those in your own domain hosting account, which is outside the scope of this guide. The above is a basic blog setup without subdomains.
If you care about SEO, don’t ignore this! While using a CDN does not necessitate installing a CNAME in CDN settings and under your domain hosting account, you’ll want to do so. So that, the hosted image files appear under your existing domain name rather than a CDN domain. If you don’t do it right, you’ll lose a lot of indexed pages and search engine impressions, so be careful!
Clear your cache and save all of your settings. The CDN should enable if everything is set up correctly.
Run another performance test after this has been correctly enabled. This time, thanks to CDN caching, there was a nice boost in speed – a 7% increase this time.

For people who live further away from your hosting company’s data center, this performance boost may be much more significant. I observed a 7% performance gain because I’m in the United States. But someone visiting your site today in Europe or Asia may see a double-digit speed boost. There isn’t a better approach to cater to a worldwide audience than this.
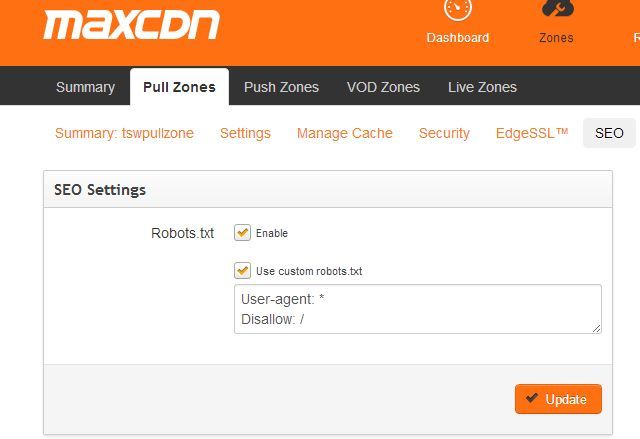
One final but crucial point to remember when using a CDN service like this is that most of your content, notably your picture assets, will be provided from a different domain. The last thing you want is for Googlebot to scan that second domain, recognize it as duplicate material from your main site. Then penalize you for that incorrect information. To circumvent this, make the CDN version of your pages and assets inaccessible to robots. CDN services will include an SEO section where you can enable this, such as MaxCDN’s SEO Settings, where you can enable Robots.txt and adjust the Disallow robots.txt entry.
As you can see, there are numerous ways to improve your website’s performance. W3 Total Cache or other WordPress caching plugins may undoubtedly assist you in this endeavor. But, don’t expect them to solve all of your problems. In addition to adding a caching plugin, make sure you’re compressing files on your web server, using a CDN, and experimenting with the Google Pagespeeed tool’s suggestions to continually improve your site. It’s a never-ending task, but it’s well worth the effort.
Read more: How To Configure The Various W3 Total Cache Plugin Settings
3 Ways The W3 Total Cache Plugin Can Speed Up Your WordPress Blog